Balsamic Pork Chops

Sunday, January 29, 2012 6:49 PM Posted by Lovely Fluffy Mama


Balsamic Pork Chops
Adapted from allrecipes.com.


Ingredients:

  • 2 Tablespoons olive oil, divided
  • 1 large onion, halved and thinly sliced
  • 4 pork loin chops, 1 inch thick
  • salt to taste
  • pepper to taste
  • garlic powder to taste
  • 1/2 pint red grape tomatoes, halved
  • 1/2 pint yellow grape tomatoes, halved
  • 3 cloves garlic, diced
  • 1 Tablespoon dried basil
  • 2 1/2 Tablespoons balsamic vinegar
  • 4 ounces feta cheese, crumbled
Directions:
  1. Preheat oven 400*F. Heat 1 tablespoon oil in a skillet over medium heat. Stir in the onion and cook until golden brown. Set aside.
  2. Heat 1/2 tablespoon oil in the skillet. Season pork chops with salt, pepper, and garlic powder, and brown pork chops, 3-4 mins (or more) each side until golden brown, but still light pink in the middle. Remove pork chops from skillet, place in 9x12 cooking dish, and cook in oven 10 mins, or until center is no longer pink.
  3. Meanwhile, heat remaining oil in the skillet. Return onions to skillet, and stir in tomatoes, garlic, and basil. Cook and stir about 3 minutes, until tomatoes are tender. Mix in balsamic vinegar, and season with salt and pepper. Remove from heat. 
  4. Remove cooked pork chops from oven, top each serving with balsamic tomato mixture and feta cheese. Enjoy!

~Lovely Fluffy Mama

Homemade Flour Tortillas

12:51 PM Posted by Lovely Fluffy Mama
My husband wanted to make quesadillas for lunch, but we didn't have any tortillas! I remembered that I had found a recipe on Pinterest for Homemade Flour Tortillas, and decided to give it a go! Pretty basic and easy. Very tasty. 


Homemade Flour Tortillas

Ingredients:
  • 2 Cups Flour
  • 1/2 Teaspoon Salt
  • 3/4 Cup Water
  • 3 Tablespoons Olive Oil

Directions:
  1. In a large bowl, combine flour and salt. Stir in water and oil. Turn onto a floured surface; knead 10-12 times, adding a little flour or water if needed to achieve a smooth dough. Divide dough into eight portions. On a lightly floured surface, roll each portion into a 7-in. circle.
  2. In a large nonstick skillet coated with cooking spray, cook tortillas over medium heat for 1 minute on each side or until lightly browned. Keep warm.

Crock Pot Santa Fe Chicken

Friday, January 27, 2012 5:44 PM Posted by Lovely Fluffy Mama
Super easy. Crock pot does all the cooking. Delicious. 
What's not to love?


Crock Pot Santa Fe Chicken
Adapted from Skinny Taste.

Ingredients:

  • 24 oz (1 1/2) lbs chicken breast
  • 14.4 oz can diced tomatoes with mild green chilies
  • 15 oz can black beans
  • 8 oz frozen corn
  • 1/4 cup chopped fresh cilantro
  • 14.4 oz can fat free chicken broth
  • 3 scallions, chopped
  • 1 tsp garlic powder
  • 1 tsp onion powder
  • 1 tsp cumin
  • 1 tsp cayenne pepper (to taste)
  •  salt to taste


Directions:

  1. Combine chicken broth, beans, corn, tomatoes, cilantro, scallions, garlic powder, onion powder, cumin, cayenne pepper and salt in the crock pot.
  2. Season chicken breast with salt and pepper and lay on top.
  3. Cover and cook 10 hours on low, or 6 hours on high.
  4. 30 mins before serving, remove chicken and shred. Return chicken to crock pot and stir. Adjust seasonings as needed, and finish cooking. 
  5. Serve with toppings of choice - shredded cheese, chopped scallions, sour cream, etc. 
This was really good! The whole family enjoyed it! I served it over rice for myself and the kids, and served it over a baked potato for my husband - he's not much of a rice guy :)

Enjoy!


~ Lovely Fluffy Mama


Cauliflower Crust Pizza

Tuesday, January 24, 2012 8:46 PM Posted by Lovely Fluffy Mama


Not gonna lie - I was really nervous about trying this one. I mean, cauliflower crust pizza?? Really? Of course, I had to try this one, since my husband and kids LOVE pizza! But I did have the back up frozen pizza ready to go - just in case ;)

So, to get started, you will need:

  • 1 cup cooked, riced cauliflower*
  • 1 cup shredded mozzarella cheese
  • 1 egg, beaten
  • 1 tsp dried oregano
  • 1/2 tsp crushed garlic
  • 1/2 tsp garlic salt
  • sauce, either homemade or store bought
  • choice of toppings
  • olive oil (optional)

*If you are wondering how to "rice" a cauliflower, so was I! Just remove the leaves and stem from the head of cauliflower so all you have left are the florets. Then using a food processor, pulse the florets until it looks like grain. Don't over-pulse, or it will turn into a puree - you don't want puree. Don't have a food processor? neither do I! Just use a cheese grater to rice the florets instead. Then microwave the riced florets for 8 mins. Don't have a microwave? Neither do I! If you don't have a microwave or do not wish to use one for this recipe, all you need to do is steam the florets on the stove after you cut them away from the leaves and stem - then you can pulse them in the food processor (or rice them using a cheese grater). Sounds backwards, but just go with it. Hope that made some sense :)

Make sure that anything you want to be cooked (meat, certain veggies, etc.), is cooked or sauteed ahead of time, since we are only going to be broiling the toppings. 

Now, onto making the crust. 

Preheat oven at 450*F. In a medium bowl, mix together the riced cauliflower, mozzarella, and egg. Then add oregano, garlic, and salt. Shape mixture into a flat, 9 inch round onto a lightly greased or sprayed baking sheet or pizza stone. You can brush the top with olive oil using a pastry brush if you wish. It will look like this...


After baking for 15 mins, it will look like this...


Looking more like actual pizza crust!


Change oven setting to broil. Add sauce, cheese, and toppings to the crust. Broil pizza for a couple of mins (3 mins MAX), just to melt the cheese. 

Remove from oven. Let cool for about 5 mins. Cut and serve :)


I was pleasantly surprised with this recipe. It was very tasty! My kids and husband also loved it. I was able to make 2 pizza crusts with one head of cauliflower. One for the kids with pepperoni and cheese toppings. And one for me and my husband loaded with all kinds of veggies and several slices from a mozzarella ball. YUM! We each had a small salad with this meal and it was plenty and perfect!

 Keep in mind that this is more of a "eat with a fork and knife" type of pizza, as the crust isn't quite as substantial as a flour crust. But I LOVE that this is a flour-free option of enjoying pizza! It felt good to eat pizza without going into a carb coma afterwards :)

P.S. I didn't have to pull out the frozen pizza ;)


Cauliflower Crust Pizza
Adapted from Eat, Drink, Smile.


Ingredients:

  • 1 cup cooked, riced cauliflower
  • 1 cup shredded mozzarella cheese
  • 1 egg, beaten
  • 1 tsp dried oregano
  • 1/2 tsp crushed garlic
  • 1/2 tsp garlic salt
  • sauce, either homemade or store bought
  • choice of toppings
  • olive oil (optional)

Directions:

  1. "Rice" the cauliflower (see top of post for instructions on how to do that)
  2. Preheat oven to 450 degrees. Spray a cookie sheet or pizza stone with non-stick cooking spray.
  3. In a medium bowl, stir together 1 cup cauliflower, egg and mozzarella. Add oregano, crushed garlic and garlic salt, stir. Transfer to the cookie sheet, and using your hands, pat out into a 9" round. Optional: Brush olive oil over top of mixture to help with browning.
  4. Bake at 450 degrees for 15 minutes.
  5. Remove from oven. To the crust, add sauce, toppings and cheese. Place under a broiler at high heat just until cheese is melted.
-Again, toppings need to be pre-cooked since pizza is only going under the broiler for a few mins-

ENJOY!!


~Lovely Fluffy Mama


Crock Pot Wine and Tomato Braised Chicken

Monday, January 23, 2012 7:55 PM Posted by Lovely Fluffy Mama

This recipe is so easy! Give it a try! 
I halved and adapted this recipe quite a bit, due to what I had on hand, and it still came out great! So, don't be afraid to tweak recipes to your taste and what you have to cook with :)

First, cook the bacon, set aside on paper towel to drain and cool. Then crumble.
Even though I halved this recipe, I still used the full amount of bacon - we love us some bacon! 

Drain all but 1 or 2 tablespoons (depending on how much of the recipe you are cooking - I only needed about 1 tablespoon), and in the same skillet as the bacon, saute the onion on medium heat for a few minutes, until softened. 
Add garlic and seasonings and cook for another minute. 
Add wine and bring to boil for 2 mins, scraping the bottom and sides while cooking.
Add tomatoes and juice and stir to combine and heat through. 

Remove skillet from heat.

Place chicken in crock pot. The original recipe calls for chicken thighs, I only had chicken breast, so in they go! Then sprinkle bacon over chicken and pour tomato/wine sauce on top. 
Cover and cook until chicken is tender - 3 hours on high or 6 hours on low. 


Crock Pot Wine and Tomato Braised Chicken
Adapted from Eating Well.

Ingredients: (my variations are in red)
  • 4 slices of bacon
  • 1 large onion, thinly sliced (1 medium)
  • 4 cloves garlic, minced (1 tablespoon pre-minced garlic)
  • 1 teaspoon dried thyme
  • 1 teaspoon pepper
  • 1 teaspoon fennel seeds (Omitted, since I didn't have it on hand)
  • 1 cup dry white wine (1/2 cup)
  • 1 bay leaf (omitted - but would have loved to use this)
  • 1 (28oz) can tomatoes, with juice, coarsely chopped (14.5 oz can of diced tomatoes)
  • salt to taste
  • 10 bone-in chicken thighs, trimmed and skin removed (2 medium sized chicken breasts)
  • 1/4 cup chopped parsley (1 tablespoon or less)

Directions:
  1. Cook bacon in a large skillet over medium heat until crisp, about 4 minutes. Transfer to paper towels to drain. Crumble when cool.
  2. Drain off all but 2 tablespoons fat from the pan. Add onion and cook over medium heat, stirring, until softened, 3 to 6 minutes. Add garlic, thyme, fennel seeds, pepper and bay leaf and cook, stirring, for 1 minute. Add wine, bring to a boil and boil for 2 minutes, scraping up any browned bits. Add tomatoes and their juice and salt; stir well.
  3. Place chicken thighs in a 4-quart (or larger) slow cooker. Sprinkle the bacon over the chicken. Pour the tomato mixture over the chicken. Cover and cook until the chicken is very tender, about 3 hours on High or 6 hours on Low. Remove the bay leaf. Serve sprinkled with parsley.

I wasn't sure what to expect, improvising so much with this recipe. But I was pleasantly surprised when it came out so good! Sometimes you just gotta roll with the punches! 


If anyone cooks this using the original recipe, I would love to hear how it turns out! 
Enjoy!


~Lovely Fluffy Mama


Homemade Graham Crackers

4:01 PM Posted by Lovely Fluffy Mama

I just love Weelicious! I can always find healthy food options for the entire family there. I really like the fact that she makes many (if not, almost all) of her kids' snacks from scratch. I have been wanting to try this one of hers for a long time, and I finally got around to doing it. My, oh, my! It will be hard to ever buy graham crackers from the store ever again! And this recipe is so easy and uses the most simple ingredients that most of us already have in our kitchen - so why not make something healthy for your kids that they will love?!

Let's get started...

 Put the flour, brown sugar, salt, cinnamon, and baking soda either in a food processor, or a bowl to mix.

After mixing the dry ingredients, pulse or mix in the butter until it looks like coarse sand.

 Mix in the honey and water until everything is combined. Take out dough and shape into a flat disk, and place between 2 sheets of parchment paper. Roll out dough until about 1/4 in thick and cut out shapes. Bake on parchment lined baking sheet for 12 - 15 mins. Cool and serve.

This made my entire house smell of cinnamon deliciousness! 
These graham crackers were a huge hit with the kids, so we will be making more of these yummy treats :)


Homemade Graham Crackers
Recipe from Weelicious.


Ingredients:

  • 1 Cup Whole Wheat Flour
  • 1 1/2 Cups All Purpose Flour
  • 1/2 Cup Dark Brown Sugar, packed
  • 1/2 Tsp Salt
  • 1 Tsp Cinnamon
  • 1 Tsp Baking Soda
  • 1/2 Cup Butter, chilled & cubed
  • 1/4 Cup Honey
  • 1/4 Cup Water


Directions:

1. Preheat oven to 350 degrees.
2. In a food processor or mixer combine the first 6 ingredients.
3. Add cubed and chilled butter to the mix and pulse/mix until it resembles coarse meal.
4. Add honey and water and continue to mix until it all combines.
5. Remove and shape the dough into a flat disk and place between two pieces of parchment paper.
6. Roll dough out until 1/4 inch thick. Cut into crackers or shapes.
7. Place cookies on a parchment lined baking sheet and bake for 15 minutes.
8. Cool and serve.


~Lovely Fluffy Mama


Ice Cube Tray Lunch

1:00 PM Posted by Lovely Fluffy Mama

I have seen this before online, and thought it was time to give it a try. The kids loved it! And I loved that they loved it :)

I like that you can mix it up which ever way you (or better yet, your child) would like. You could even have your child help pick out which foods they want to put in. It turned out to be a fun sensory activity too! 

We filled ours with blueberries, pepperoni, asiago cheese, spinach leaves (with a touch of italian dressing), apple slices, yellow grape tomatoes, strawberries, cheddar cheese, turkey, cantaloupe, carrots, and pretzels. 

It was fun seeing how excited they were about having all of those options! You could see the look of empowerment and accomplishment as they carefully decided which foods to eat. They even ate the tomatoes, which they wouldn't have normally eaten if they didn't look so fun in their cute little 
compartments. 

It was nice to change things up a little with lunch time. We will do this more often - a snack tray would be fun :) Have a great day everyone!


~ Lovely Fluffy Mama


To Home School or Not To Home School?

Wednesday, January 18, 2012 5:56 PM Posted by Lovely Fluffy Mama
I never thought that this would even be a consideration. I was never a "kid" person, and I for sure didn't want to be a teacher of any kind. Even after having my 2 kids, I always said "No way! Not a chance!" when asked about homeschooling.

That was until this last year. Now I am having second thoughts. I have really enjoyed being home with Riley and Noah, and being able to "teach" them what I have already - even in my unstructured, and at times, completely chaotic and terrible learning environment of a home. Then on the other hand, for selfish reasons mostly, it seems like it would be really nice to have the kids spend some time in preschool. With other kids. With real teachers. Away from me ;)

Then I have heard of homeschool groups and activities just for homeschoolers so that they can receive the benefits of staying home for school, yet the kids can still be involved with other kids and such. And of course there's always sports, dance, etc they can take part in. I'm just so confused. It seems like there are many options out there, especially depending on what state you live.

I would love some opinions and advice! What are the pros and cons of homeschooling? Is it overwhelming? Did you always want to homeschool or did the idea grow on you eventually? What age were your kids when you started? Any info would be greatly appreciated :)


~Lovely Fluffy Mama

Concrete "Worksheets"

Tuesday, January 17, 2012 4:04 PM Posted by Lovely Fluffy Mama
I like this activity because it is so simple and the kids love it!

Instead of being inside at the table doing worksheets, we took it outside!
Just draw out whatever game or activity you want with sidewalk chalk, and let the kids complete it! Simple as that!

 We decided to do a colors/shapes matching game :)


The possibilities are endless! You can do weather, letters, numbers, time, etc. Anything that would normally be done on a worksheet, just draw it onto your carport, driveway, street, sidewalk, porch, garage, etc. You could even have the kids draw out their own activities. Get outside and have fun with it!


~Lovely Fluffy Mama


Mushroom Zucchini Rotini

Monday, January 16, 2012 9:52 PM Posted by Lovely Fluffy Mama

This is a big, hearty pasta dish. You could incorporate any veggies you like, use any pasta you like, with any sauce you like. This is the version I like :)

I like to make this sauce ahead of time to use with my pasta and pizza dishes. You could freeze it if you aren't going to use it right away, or keep it in the fridge for a few days until ready to use.

Cook the pasta according to package directions. Drain and set aside.

Brown the ground beef over medium high heat. Drain, if necessary, return to skillet and add the sauce. Let it simmer over medium low heat.

 Meanwhile, saute the zucchini and mushrooms until zucchini is slightly tender. (You can also add a small chopped onion to this, but my sauce has enough, so I chose not to add more.)

 Add the zucchini, mushroom, and pasta to meat sauce and stir until fully incorporated. Make sure to season with salt and pepper if needed.

 In a slightly greased baking dish, layer half of the pasta with 1 cup colby jack cheese. Then pour remaining pasta and top with 1 cup mozzarella cheese.

 Bake uncovered for 20 mins or until cheese is melted.
YUM!


Mushroom Zucchini Rotini


Ingredients:

  • 16 oz rotini pasta
  • 1 lb ground beef
  • 32 oz marinara sauce
  • 2-3 medium zucchini, chopped
  • 8 oz fresh mushrooms, chopped
  • 1 cup shredded colby jack cheese
  • 1 cup shredded mozzarella cheese
  • salt and pepper, to taste
Directions:

1. Preheat oven to 400*F. Cook pasta according to package directions. Drain and set aside.

2. In large skillet, cook ground beef over medium-high heat until fully browned. Drain, if necessary, and return skillet.

3. Pour marinara sauce into the same skillet, with heat turned down to medium-low and let simmer.

4. Meanwhile, in separate skillet, saute zucchini and mushrooms over medium heat until zucchini is slightly tender. 

5. Add zucchini/mushroom mix and cooked pasta to meat sauce and stir until fully incorporated.

6. In a lightly greased baking dish, layer half of the pasta mixture with 1 cup colby jack cheese. Then top with remaining pasta and 1 cup mozzarella cheese.

7. Bake uncovered 20 mins, or until cheese is melted and bubbly. Enjoy!


~Lovely Fluffy Mama

Cloud Dough

3:36 PM Posted by Lovely Fluffy Mama
I have been seeing this fluffy looking sand called Cloud Dough posted all over the internet, so I finally decided it was time to try it! This stuff is wonderful! 

You only need 2 ingredients, flour and baby oil. 1 cup baby oil and 8 cups flour. I actually only used 1/4 of that (1/4 cup baby oil and 2 cups flour for those who are terrible at math like me!).

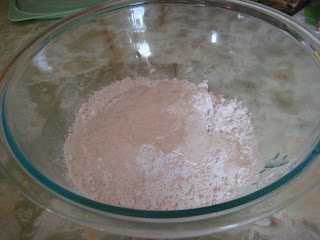
Put ingredients in a bowl (or whatever container or bin you like).

 After you mix the ingredients together it looks like this.

Now it's time to play!


 Cloud Dough is awesome! The texture is so soft and fluffy, yet you can mold it in your hands.

Keep in mind it can get quite messy, so a huge sensory bin would have been nice for this one. Or even taking it outside would be fun! Get creative! I have seen glitter and color added to Cloud Dough before, so have fun with it and let yourself and your kids be creative!


~ Lovely Fluffy Mama


Sensory Play: Uncooked, Cooked, and Colors

Sunday, January 15, 2012 1:25 PM Posted by Lovely Fluffy Mama
Pasta and grains are great for sensory play! I have a variety of both, so I decided to use them both cooked and uncooked for this activity. 

First, we started out by feeling the uncooked version.
Orzo, Oats, Quinoa, Rice Noodles


They got right to it!

Their favorite was the quinoa.

Mixing things together.

Fun!

I suggest cooking some of the grains and pasta ahead of time. But, since I didn't do that, we took a short break to do so. 

In the meantime, Riley wanted to give Noah a "check up" to make sure he was feeling ok today :)

Heart and breathing patterns seem ok.

Checking his temperature...with a syringe? ok!

 And lastly, the eyes. Looks good!

Ok, back to the activity.
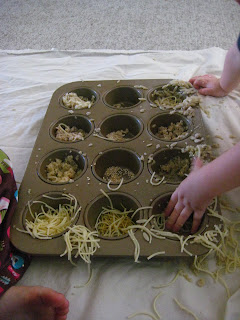
Everything has been cooked and cooled. The top and bottom 4 tins contain the cooked version. The middle 4 tins contain some of the uncooked, so they could see and feel the difference. You could actually skip my first step completely if you cook your pasta and grain ahead of time and just start with this :)

Looks and feels a lot different!

 They still love the quinoa!


 They love to smell everything!


 Having fun being messy :)


Then the REAL fun starts! Adding colors and painting!
I added some leftover cornstarch paint from another project, but any washable paint would work.

Smashing the noodles into the paper.

 Trying out each one.

 Smashing again.

 Riley's Masterpiece.

And Noah's.


I love how you can see each one - orzo, oats, quinoa, noodles!

 The aftermath! It was well worth the cleanup :)

This activity was great! A little on the messy side, so be sure to lay something down on the floor or table, or just go ahead and take it outside if the weather permits. Have fun!


~Lovely Fluffy Mama